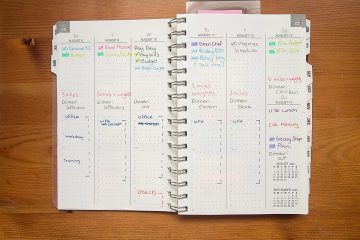
Get ready to start putting your money to work for you when you track yo money!
We are going to put together a very basic monthly budget. You should have your past three months of paychecks and bank/credit statements handy. If not, you can pull them up online.
First, add up all of your income sources. If your income is variable, figure out your average and round down. It’s best to underestimate your income.
Second, go through your bank and credit card statements and determine your fixed and variable expenses. If you don’t know the difference, fixed is any bill you pay the same amount every month while variable can fluctuate. Now, determine your average monthly expenses. Here you will want to round up.
Third, take your average monthly income and subtract your average monthly expenses. Do you have a surplus or deficit? The goal is to get to eventually get to zero after expenses, debt payments, and savings.
If you have a surplus, you will need to determine where you want that money to go. Will you make extra credit card payments or save more? If you are negative, review and evaluate your expenses. Are there any obvious areas you can cut? I say cut, not eliminate, because budgets often fail when we jump too far in one direction. As you go over where your money has gone, do you see any subscriptions you don’t use anymore? Cancel those first. Cut one meal out per week or month.
Now we will write out a very basic monthly budget to start using. Be sure to grab your monthly budget pdf here. You will put in the month and then fill out what you think you will spend for your fixed and variable expenses, any credit card payments, and anything you are able to save. When you end the month, you will fill in what you actually paid in each category and then see if you were over and under.
When you start your budget for the next month, review the previous month. Where did you overspend? Do you need to budget more there for this month and reduce spending in another area? You will review and update your budget each month. Budgets are not a static thing. They are always changing.
Your homework before the next blog is to start tracking your spending. Each day, set aside time to write down what you have spent that day or the previous day if you do this first thing. Write down what you bought, where, and how much. You can use a notebook, or spreadsheet, or grab my pdf here.
How does your basic budget look? Are you ready to tackle next month?
You’ve decided, 2023 is the year. You are finally get yourself organized and start using a planner!
Maybe you’ve just been wanting to start planning because you have a lot going on at home or you started a new job and want to start off on the right foot. You have looked at a million blogs and planner sites, you’ve watched hundreds of hours of YouTube reviews and you have analysis paralysis.
You do not know what you want anymore!
Don’t worry, you will get through this. We have all been there are some point, maybe even multiple points. You are not alone and you’ll find a planner. The first planner you pick might not be perfect but it will teach you what you like or don’t like and will help you choose better next time.
You are probably looking at many types of planners, from pre-printed to bullet journals. The first thing to think about is how much work do you want to do to be set up in your planner. Do you need something already dated or are you ok with an undated planner? Bullet Journals will be the most work as you decide what you want/need and put it in there. Take some time and think about this part.
Pros & Cons Dated Planners
Pros:
Everything is already printed and ready to dive right in!
Easy to find and sometimes you can get an older planner on sale to test it.
You don’t have to really think about the planner, you can jump right into planning.
Cons:
Some things may not be applicable to you.
They are usually limited to January or July start dates and may not have it before January.
If you don’t use it for a while it feels like you wasted weeks or months.
Pros & Cons Undated Planners
Pros:
You can start it anytime!
You can choose a Sunday or Monday start if they do not label the days of the weeks
You can put it down for a while and start back up anytime.
Cons:
It takes a little effort to prep everything.
You have to write in (or sticker) all the months, dates, and sometimes days and may mess up (been there done that).
Some pages or dashboards may not be applicable to you.
Pros & Cons Bullet Journal
Pros:
You can make it anything you need or want.
You can change it each day, week, or month as you figure out what you really need.
You can make it simple when you need it and when you have more time you can get fancy!
Cons:
You have to spend time figuring out what you need or want.
You have to set everything up each month (at minimum).
It can be intimidating.
If you are starting out in planning or getting back in after some time away, a pre-printed planner might be a better choice than a bullet journal. If you want to move to a bullet journal later, you can use your planner experience to help determine your spreads.
If you have decided to go with a pre-printed planner, now you have to decide if you need a monthly, weekly, or daily. Monthly usually has the months with some note pages, some between months, and some at the end. Many people use monthly planners for budgeting or project planning. Weekly planners typically have the month followed by weekly spreads while daily is the month followed by daily pages.
A few planners will offer monthly, weekly, and daily spreads but they are fairly rare, a bit more expensive, and quite chonky.
You can use more than one planner but to start I tend to recommend using only one and would say get a weekly planner. You get a monthly view for your big picture planning or bill paying etc and then you can use the weeks to track your appointments, meal planning, tasks, and other weekly/daily items.
Weekly planners usually offer hourly, vertical or horizontal layouts. Horizontal is the one most of us probably think about when we say planner. They have been around for pretty much ever and often are the layouts in school planners. If that style works for you? Great! If you have struggled with horizontal layouts in the past, consider a vertical one.
You now have some planner basics to start your search. What planner do you think will work for you?
Stay tuned for next month because we will dig deep into selecting a planner in an ongoing series!
Need a visual version of this post? Check out the YouTube version and don’t forget to subscribe for the ongoing series!
Does the Living Well planner work for someone with ADHD?
When first checking out the Living Well planner I was very excited. It seemed like it had everything, monthly and weekly spreads, space for goals and meal planning, plus budgeting! How awesome! You can have everything in ONE planner already laid out for you! You no longer need multiple planners. This is great!
But was it great?
The Living Well planner had potential and I think the calendar part would work well but the goal section needs more to it while the budgeting became overwhelming while still needing to catch up. Confused? Yeah, that’s how I was trying to figure out goals and budget here.
First, be sure you read the information at the beginning. I know, I know. Usually, you skip that stuff huh? It does offer some insight into the goal-setting pages. It also tells you to go to the website for more help… really?!?
The planner contains no real help in setting goals. You get a page to write out your long-term goals and two pages a month for goals. Each month you will pick your big three and a top goal. The top goal is your main focus. You will use the goal crushing page to break down your top goal. And that’s it. I guess even though you have a top three you are only supposed to do the one? It really doesn’t make sense.
The goal section is followed by a project planning page. I didn’t use this but I could see it being helpful if you have an event coming up or are doing some work around the house.
Then you move into the planning pages. You start with the monthly spread. I liked how this was set up. There is plenty of room on each day and they are lined. That might be the best part. It was easy to write in events. There is also a wide notes column and a spot for six big days. I didn’t use this but I could see it being handy to write down birthdays or events!
Then you get your weekly spreads. The layout is great but the hourly section does not allow for anything then on the hour appointments. The hourly section does go from 6 am to 10 pm which is more than most but you sacrifice half-hour spaces.
Below the hourly section, you get your three must-do, and under that is a box for meal planning. You also have a notes column and big days on the side. There is room for six big days which seems a little silly as there are only seven days in the week. This made more sense in the monthly spread to highlight dates.
The weekly layout is fairly flexible.
You can use stickers and washi to section off the hourly or meal plan boxes if you need to add other categories or tasks. You can also use stickers to make items stick out. And the paper will hold up to highlighters with only slight ghosting.
I could see myself using the planner parts of the Living Well planner.
Now you move to the budget pages. I tried to fill these in. I started. But I couldn’t do it. First, there are too many categories. Second, they have decided what ALL the categories are and where you will want them. I’ve found I need to keep my categories fairly simple or I get overwhelmed and give up on my budget. I would have rather they had left the expense columns blank and allowed you to fill in what you use.
On the budget spread, they have the income minus expenses equation but they give you zero space to enter your income. We get at least three or four checks a month, depending on where paydays fall. If you get paid once a month I guess this would work? Or maybe if you don’t have any variable income and get the same amount every month then maybe this would be ok.
On the next page, you get a spot for monthly expenses and money goals. You get 32 lines for expenses but they do not have a spot for categories. If you don’t make a note and then try to fill out the budget page you won’t know what category the expense goes to. It’s bizarre.
I used the money plans and goals to list out our income. Or at least I started to. I never finished any of the budget pages. They didn’t make much sense to me. The budget pages were overwhelming but the monthly expenses page was underwhelming. It was missing a spot for categories. And there was nowhere to enter your income!
Does anyone understand this budget section and can you explain it to me like I’m five?
Next up there is a thoughts and thank page. I didn’t use this but it is two columns with seven sections in each column (14 total) to record your gratitude. Since it is a fairly blank space you could use it for other things. It is next to the monthly expenses page so you could use it for budgeting. You could make it your cleaning schedule.
Last, there is a line notes and idea page before you move into the next month.
My final verdict? The planner pages would work pretty well for someone with ADHD. The only issue is the hourly section. I used stickers or wrote 7:30 if I had something that wasn’t on the hour. It’s not perfect but it can work.
The goals and budget section? Nope. I need more space on goals to do action steps for more than one goal. And the budget section was just a hot mess that made zero sense to an ADHD brain.
Interested in getting the Living Well Planner? Head over to YouTube and enter the giveaway by 12/23/2022.
Would you use the Living Well Planner? What do you think would work well and what fell short for you?
Is one of your goals for 2023 to finally start budgeting?
It’s one of those areas you say you will get to but never seem to follow through. You don’t know where to start or what you might need. You aren’t sure if a budget book would work for you, maybe it seems like a lot of work.
Getting your budget in order can be difficult but it doesn’t have to be!
Erin Condren has come out with a new line of budgeting tools and sent me a box to check out, review, and give you my thoughts. You can grab your own items over on Erin Condren! Affiliate link. I will receive a commission if you purchase. I will always give you my honest opinion whether I am sent a product or purchase it myself.
At first sight, the Budget File Folders Calendar isn’t very impressive. It’s a wall calendar, nothing special right? Wrong! Each month is also a file folder that you can tear off and file away. Perfect for storing all those receipts you need to turn over to your accountant at the end of the year.
You could use the calendar to track your paydays and bills due plus there is plenty of room on the back side to track expenses or mileage if you drive for work/business. The back side also has a budget overview so you can see how much you spent each month.
This is definitely one to get if you have a lot of receipts or other papers you want to keep track of each month.
You also get a sheet of stickers at the very back of the calendar. I give it ☕☕☕☕ out of five, losing a coffee only because the folder tears off a tad too easily. My January is already coming off from flipping through for videos/photos. This may not be an issue if you aren’t manhandling it!
If wall calendars aren’t your thing you can also choose from the A5 Budget Planner in a coil or ring agenda. Currently, the ring agenda version is only available with the agenda. You cannot purchase only the inserts. Both versions are exactly the same inside so it really is which you prefer.
You get 12 months of budgeting plus eight each of savings trackers, debt trackers, and special occasion budget pages. The planner is undated so you can start it anytime. The only drawback is you don’t get a monthly planner inside to track your paydays and bills. There is a bills/financial dates and deadlines list on the dashboard where you could put them but really a calendar view would be better if you need a visual version.
The dashboard also has boxes for “restock on” and “larger purchases”. If you don’t need these you could easily cover them with stickers and give them your own titles. The other side of the dashboard has a large box for your month’s financial goals. I don’t think it is large enough to draw in a calendar. There is also a to-do list and blank box. Overall the dashboard is fairly flexible and could be adjusted to fin your needs.
The Monthly Overview is on the next two pages and it is great that you can see all your budget categories next to each other. The older A5 inserts are back to back and it can be a pain to flip back and forth. After the monthly overview, you get six weekly spending logs. You could easily use one for checking, one for credit card, one for your spouse, etc instead of weekly.
If you were creative, you could use four (or however many paychecks you have) of the weekly spending logs to budget by paycheck with the other two as your expense trackers.
At the beginning of the planner and after each quarter there are goal planning and check-ins, with the last one being a longer 12-month check-in. I would give the planner ☕☕☕☕1/2 out of five coffees because I’d still love to see a calendar view, even if it was blank and we had to fill it in. I also would love to see the inserts available without the agenda. Maybe next year.
I also received a handful of accessories.
First, the Flora Budget Accordion File would be another great place to stash receipts. You could also use this to hold your cash envelopes. Or to hold stickers. There are 12 sections in it. ☕☕☕☕☕out of five.
Second, the A5 Ring Agenda Budget Tracker Dashboard has room on the front for 13 bills to be tracked monthly while the backside is split between a savings and debt tracker. You could also track your budget category spending instead of bills. It is wet erase so at the end of the year, wipe off with water and start again! ☕☕☕☕☕out of five.
Maybe you don’t need a full budget planner but want to track your spending? Check out the Weekly Budget Tracker Notepad! There is room for your weekly budget and goal as well as debt paid down, added to savings, and next week’s budget. This would also work great for holiday budgeting or other special occasions! ☕☕☕☕☕out of five.
Next up is the Budget Dual-Tip List Markers. Each marker has a fine tip at one end and a stamp at the other. You get a circle, check, asterisk, and piggy bank all with black ink, an envelope (red ink), and a dollar sign (jade ink). ☕☕☕out of five. These are a great idea but the stamps take a little manipulation to get on the paper and the piggy bank, check, envelope, and dollar sign are hard to line up correctly.
The Budget Functional Sticker Book comes with a ton of stickers in a variety of options to track your budget. The book has both warm and cool tones stickers. They are absolutely beautiful! ☕☕☕☕☕☕☕☕☕☕ out of five.
Erin Condren has a lot of options to meet your budget needs. Want to see a video version of this review? Head over to YouTube. Be sure to subscribe as these products will be making an appearance in future videos and you can see how they will work with a real budget!
What items from the new budget collection are you most interested in? Which are you hoping to pick up?
Looking for budgeting and financial challenges or support system? Check out the Runs on Planning group because we will be getting our budgets in line in 2023!
I will admit when I first got the Planner Pad I thought it was going to be overwhelming and too much to actually work.
Link is an Amazon Associate link, I may earn a commission if you purchase using my link,
I was presently surprised by this little gem!
The Planner Pad does come with instructions in front of the planner and a link to watch a video on their website. It feels intimidating but once you read through the instructions and/or watch the video it makes more sense. They also include ideas for how to use the calendars and notes in the back.
After the instructions are important phone numbers with room for names and numbers followed by a three-year calendar (mine has 2022, 2023, and 2024). After that is yearly planning for the same three years, then holidays, and a time zone map before we get into the actual planning pages.
I used it for three weeks to get a good feel for it. The first week I used pencil because I wasn’t sure exactly how to use. You are given seven categories and I tried to think of seven areas of tasks that I had. I ended up changing them a bit for week two and liked those better and continued them into week three.
Once you pick your categories you fill in the activities or things you need to do in those categories. Then you go through and assign them to a day of the week and put them on the to-do list (middle) section. The bottom section is for appointments. The first week I tried to assign all my to-dos to a schedule and it did not work for me. It felt messy and redundant. For week two and three, I put in appointments, meetings, and a couple of the to-dos that I knew I would do at a certain time.
The side bar in the personal size has a notes/calls section and an expenses section. I used the notes spot to jot down my thoughts on the planner and I attempted to use the expenses to track how much I spent each day. You could also repurpose it for tracking other habits with a little creativity and dot markers or highlighters. The instruction photo shows the dated executive size and the side column features mini months for the previous, current, and next month. I do not like mini months on ANY planner and am glad the undated personal size had none of that. Mini months take up valuable real estate! And if I wanted to see a month, I could flip my planner or use my Google calendar (which is what I do).
In the back of the Planner Pad are 12 goals/project pages and twelve note pages. You could use the goals/project pages as a monthly calendar. They also suggest using these for collecting info, taping in things you cut out of magazines, charts, quotes, or other items. They suggest using the notes pages for meetings, discussions and other such items. Personally, I probably wouldn’t use them. I rarely use note pages that in the back of planners.
Initial Impressions
I think this could work really well with practice. Once you figure out your top categories, it becomes much easier. And I realize, as of writing this, you don’t actually need to fill all seven categories. If you only have three? You only use three of the columns. This may also change from week to week depending on what you have going on. Yah, not sure why it took me so long to figure this out. I guess I don’t want to waste space when testing something out?
I also felt the first week felt a little redundant doing the daily to-dos and then trying to put them on the appointments. If you are a timeblock type scheduler it may work for you but I tend to rebel against my schedule when I try to timeblock. I found it works best for me to just put most things on a daily to do list and not try to assign it to a time. But that’s me, you make LOVE this feature!
In week two I realized I kept putting appointments and items on the wrong day. The bottom section does not have the days of the week like the middle section does and I put all my Thursday meetings on Friday and needed to white it out and move them. I think the Planner Pad would benefit from carrying the days of the week to the bottom section as well.
I happened to have some days of the week stickers leftover and I used them in week three for the appointment section. It was much easier once I had the visual reference there. I looked at the dated ones on Amazon and they don’t have the days of the weeks in the appointment section either. I get most people will look at the middle/to-do section then follow down to the appointments but when I was adding meetings, I wasn’t pulling them from the to-do section as I don’t consider those to-dos!
The Bad
Steeper learning curve than a regular planner
No days of the week on appointments section
Appointment section runs from 7 am to 8 pm
No monthly calendar
Only available on Amazon
The Good
Extremely Flexible
Spot to cross off in to-do section
Saturday and Sunday do not share space
Undated version means you can use as needed
No monthly calendar
You can be creative with color coding, dot markers, or highlighers
Slim enough to carry in purse, briefcase, or laptop bag
Price ($32 for undated personal size, $34 dated personal or executive size)
No monthly calendar gets put on both good and bad. For me? Fine, don’t need it. Don’t really use it. My monthly calendar gets filled in before the month starts and never referenced again. But I know others depend on it so that may be important to know.
Final Verdict
The Planner Pad is a great tool and for some with ADHD would really help with what to do and when. It does take a little effort to figure out the best way to make it work for you but it just might be worth it! You can really personalize it to suit your needs.
By my third week, I had settled into my categories and set up my appointments to really work for me. I also loved using highlighter to add some color and be a little creative. The days of the week stickers would be something I would continue to use or a white gel pen to put the days on the black bar that seperates the columns. I need the visual reference for the section.
I debated about keeping this because I liked it so much but I cannot part with my daily planner. I thought about using it for work next year but I’d prefer the dated version for work. I actually need it every week and don’t want to waste time dating it.
Since I am not keeping it, I will be removing the pages I used and giving it away! Head over to YouTube for your chance to win!
Tell me: Would you use the Planner Pad? What is your favorite and/or least favorite feature?
You’ve read through What is a Budget, and maybe you’ve even set up a Holiday Budget, but now you are ready to settle in and set your budget! What will the first steps be? We are going to figure out our why and set some goals. And I’ll give you homework for November’s blog.
We want to determine our why. Why do you want to budget? Why do you want to get your financial life in order? You can have one why or many. It really depends on what you are doing this for. If you are making a budget because it’s what you’re supposed to do, you will most likely fail. If you sit down and think about your why and realize you want to start a budget to stop living paycheck to paycheck or to help teach your children about money so they don’t struggle as you did, it will be easier to stick with your budget.
Me, I want to get my finances in order so I don’t have to stress about money. I want to make sure I have enough to fund the experiences I want to do now and well into my retirement. I want to enjoy my retirement and not have to work full-time until I die.
We will all have different whys and they will change over time.
Next, we are going to set our goals but first, we are going to answer some questions. You should be honest with yourself. No one else is going to see your answers. Your worksheet has space to answer these five questions.
Think about your current financial situation. What is one thing you could do to improve your financials? How would your life change if you fixed just that one thing?
What are your financial hopes and dreams? Think about the little things and the big, pie-in-the-sky stuff. Don’t limit yourself. Where do you want to be?
Start a list of how you can improve your current finances. What could you cut out? What could you work to spend less on? Remember, this shouldn’t be all or nothing. You don’t want to cut everything all at once and end up feeling deprived and going on a spending spree. Can you make coffee at home? Maybe investing in a fancy coffee machine and some supplies would help save in the long run.
What obstacles do you have? What are your money fears or limiting beliefs? Write down each obstacle and try to think of two or three solutions for each.
Imagine how you will feel when you have reached your goals. Write it down. Reference it often, especially when you are struggling.
We have our why. We have taken some time to think about and answer the five questions. Now we will set some goals. We will decide on a few goals and pick one primary goal to work towards first. As stated above, we don’t want to go all in and get burnt out or feel like we will never reach our goals. Once you feel you have a good handle on goal number one, you can add in goal number two. You can also reach goal one and then move on to goal two. It will really depend on you and what your goals are.
Of course, you will be reviewing and updating your goals as we go along. I tend to look at my goals every quarter and see if they are still relevant or serving me.
What kind of goals can you set?
Pay off credit card debt
Build an emergency fund
Stop living paycheck to paycheck
Plan for retirement
Improve credit
Payoff home or car loans
Start, or increase donations
Start investing
Write a will
Those are nine basic examples of the types of goals you can set and work towards. If you have credit card debt, you may want to start there. Write down your top three goals on your worksheet.
First, pick the goal you want to prioritize. We will use credit card debt as our example. We are going to answer a few questions. Not all of these will be applicable to each goal so if you don’t have an answer for something it’s ok! Move on to the next one. And sometimes, you need to put in some work before you can answer! That is totally ok, make a note that you will come back after reviewing some resources.
To start, answer the who, what, when, where, why, and how.
Who? You and your partner need to be on the same page. What? Pay down debt. When? We will start on our next credit card due date and it should take us six months to pay off. Where? Not applicable. Why? To have financial freedom. How? We will review the different methods and pick the one that works best for us.
What do you need to accomplish this goal? What resources or supplies do you need? For your credit card debt, you may need all your current statements. You need to know what you owe and the interest rates. Are there any skills I need to brush up on? For the debt payoff, probably not. What do I need to learn? You need to learn HOW you will pay off the debt. Should I do the avalanche or snowball? Something different? You will read up on different methods and philosophies before deciding. You may want to try an online calculator to see which will pay it off fastest or with the least amount of interest.
You’ve reviewed your resources and have decided to start with the snowball method. You think paying off the smallest debt first will give you a boost to keep going. You can update your how section now.
Lastly, we are going to take each goal and break it into smaller, manageable steps.
For our debt payoff, we will list our debts, minimum payments, and interest rates. Grab a notebook or spreadsheet and list your debts in the order you want to tackle them, based on the snowball method (smallest to largest).
We now have all our debt info in one spot. The next step will be to determine how much extra we can pay for our first debt. Maybe you can pay an extra $50 a month. Make a note on your list or spreadsheet. For me, my next step would be to write the bill and new payment amount on my bills calendar. Then when I go to pay bills, I’d consult my calendar, see my planned payment, and set up payment. You may go in and set up an autopay right away so you don’t forget. You may also set up the other card’s minimum payments at the same time.
Your steps may look different than mine. We will all have different small or manageable steps depending on how our brains work!
Let me know what financial goal you are going to prioritize in the comments.
I used the credit card payoff as an example because that is my main goal right now. I am also building an emergency fund but it is not my primary goal and is not where my focus lies right now.
Next month we will tackle starting our budget! Your homework is to gather your bank statements, credit card statements, and paychecks from the past three months! You will need them to figure out where the heck all your money is going!
Need a visual walkthrough of all the steps? Head over to YouTube and watch the video version (and don’t forget to subscribe so you don’t miss all the other budgeting videos that are coming)!
Today we are reviewing The ADHD Planner in green ($34.99), also available in black. The green is hard linen cover and definitely has a rougher texture, which may be an issue for some with ADHD and sensory issues. It looks like the black may be the same material. The planner is 6×9, a good size for portability and not too small for those of us with large handwriting! There are three (3) ribbon bookmarks that hang out about an inch at the bottom of the book. The paper is very smooth. There is no tooth or texture but it does seem thicker than average paper.
It is undated, which means you can start it anytime and if you don’t use it for a while you can pick it back up at any time.
The Amazon copy mentions that it is made by people with ADHD and was made for those with ADHD. The cover and spine are imprinted with The ADHD Planner in gold. I think it is quite noticeable so some people may not be comfortable using this planner at work. I am open about my ADHD but I know others do not like to share or don’t want their employers to know. On the back epic self is imprinted in gold along the bottom edge. I kinda wish this was on the cover and spine instead!
I was actually quite excited to test this one out. I did an initial flip through and it seemed like it would be really helpful!
So what all is in here that got me excited?
The first page is titled Intention Clarification and has seven areas of life/goals and asks where you are now, where you want to be, and why for each area. Next to that is a goals page with room for six goals. I guess you have to drop one of the areas. The next six pages are for really breaking down each goal (and it looks like the family was dropped. Guess it got lumped in with relationships).
Next up is a routines and rituals page where you can fill in a morning, get in the zone, and evening routine. Followed by a brain strategy place to jot down things like what motivates you. There are two pages for listing Master Projects with space for two personal and two business project lists. Lastly, before the actual planning pages are two pages for to-do, each to-do page has a spot for daily, weekly, and monthly personal and business to-dos.
Moving into the planning pages, we have a weekly overview, review, and preparation. The overview is more planner focused while the review and preparation feel more like a journal to me. Next is a brain dump and a weekly schedule. Each day of the week gets two pages. The first has tasks, chores, and checklists to make sure you did your routines and drank water. There is also a space to do time blocking. The second page is more journal-like with affirmations, notes, and accomplishments.
This pattern continues to the end of the book. The Q&A on amazon says there are 13 weeks. I did not count to confirm this. (I’ve got ADHD, do you really think I’d sit and count that?!)
In the end, you get two lined note pages and nine ways to get out of an ADHD rut.
I really like how the planner is set up and feels like a cross between a planner and a journal. On the surface, it feels like it would be helpful. But would I keep up with it? Would I stick with it?? I used it in September for the month before making my verdict.
The first thing I did was start at the beginning. The intention clarification and my goals pages were a little difficult with no directions. I had to sit and try to think about how to set the pages and how I would fill them in. Some of the spaces were small and awkward to write anything of substance in. I did like the individual goal pages. There was logic to working through the page. I wish the obstacles and solutions boxes were bigger or instead of being vertical were horizontal. I liked the three-month habit tracker as well.
I only partially filled out the routines and rituals. I am not a fan of the time because depending on the day it can vary. I also still don’t know what a “get in the zone” routine is. I also skipped the stuck and unstuck part of my brain strategy.
I ended up not filling out the master project and to do pages.
I started using it the week of 8/29. And I realized that it’s not a planner I can keep up with. I thought I would really like this one but it’s… ok. Even using a ribbon to mark the goals pages? I never go backward. I never check in on those pages and I never used the habit trackers back there.
It also became very redundant within itself. I did like the big 3 for the week on the weekly overview but the rest was worthless. I would write in the important events, dates, and deadlines there then re-write them on the weekly schedule AND the daily pages. It quickly became too much.
The weekly review and prep page was great and I enjoyed the weekly reflections. The habit tracker? I was always scrambling to fill it in at the end of the week, which isn’t really the point. I used the brain dump for one week. I liked the weekly schedule and preferred that to the review. I can see the week at a quick glance.
This brings us to the daily pages. I wish the big 3 and other tasks had check-off circles like the daily chores. I ended up using a highlighter or dot pens to make my own checklist. I need to check things off and I don’t like drawing a line through the task in case I want to look back and see what I did. I used the vitamin space to check off when I take my medication.
The daily affirmation got old after six days. Maybe a weekly affirmation would be useful.
The notes and accomplishment sections were helpful. It made me sit down each night (or the next morning) and really think about my day. I also jotted things in the note section I didn’t want to forget or wanted to schedule out
The ADHD Planner had some great things about it but other not-so-great things. Am I going to continue using this? Probably not. I mean I have it, so I might. But I’m no longer excited about it. My EC daily duo and Makselife goal pages work so much better for me. Would I recommend this one? No. I think it has potential but there is too much redundancy and it expects you to remember to go back and look at what you did previously.
I think it could be streamlined and the goals incorporated into the weekly overview. If it were me, I’d remove the important events & deadlines section and replace it with weekly goals. And maybe change the daily affirmations into some daily goal work.
Also, the price point for this is a little steep for a 13-week planner. For a year you would need four of these at $35 each. That’s $140 for the year.
What do you think about the ADHD Planner? Would you try it? What is your favorite or least favorite thing about the ADHD Planner?
Want to see the walk-through and how it worked out? Head over to YouTube for the video review!
Halloween. Thanksgiving. Whatever December holiday you may celebrate.
All of these are right around the corner and will be here before you know it. Have you thought about how you will budget for all of these upcoming events? In reality, we should have started in January, or even July, but it’s never too late to plan and budget!
Why should you budget for the holidays?
The main reason is to avoid going into credit card debt, or more debt for some of us. The second reason is to know what you can spend on gifts, food, and new decorations. You can make a plan of everything you need to buy for the holidays and look for the best deals. You know, instead of running out at the last minute to grab whatever you can find. Lastly, so you can enjoy the season with less stress!
How will you create a holiday budget?
First, think about where you want to be at the end of the year financially. Do you want to be in more or less debt? Are you saving for anything? Working on an emergency fund? What financial goals do you have for next year? What major expenses might you have come up? What are your priorities for the year? Why are you thinking about these? Because you don’t want to put yourself behind on these goals just to fund your holidays!
How to set up your budget:
Sit down and figure out your current financial situation.
Grab a planner or calendar with September through December and mark all of your paydays. Estimate how much money you will have for each check
Next fill in all of your upcoming bills and expenses. If you don’t know how much your electric bill will be, make an estimate. You can probably look at how much you paid last year and add a little more to be safe.
Add up all your income and bills and then subtract your bills from your pay
How much do you have leftover? There is your holiday budget starting point!
Create a plan for each holiday. If the holidays listed here aren’t ones you celebrate, swap them out for the ones you do. These are the ones we budget for in our house but I know not everyone celebrates Halloween or Thanksgiving.
Write down everything you need for each holiday, including gifts, food, and decor
Start collecting coupons, discount codes, and redeeming any points you could use towards items on your lists.
Halloween
Costumes – how many costumes do you need? What can you reuse from previous years or things you already own? What do you need to grab?
Candy – Do you know how much candy you gave out last year? Are you going to grab it early and save it or do you need to wait until closer to Halloween? If you can get it early, you can grab regular candy on sale and not the “special” Halloween branded candy.
Decor – Take inventory, what do you already own? Do you need to replace anything? Do you want to get anything new?
Other – Is there anything missing you want to budget for? Do you do school cards or host a party every year? Write that down!
Thanksgiving and December Holidays
Food – make a meal plan if you’re hosting. Write down what you’ll make and what you’ll ask others to bring. Take inventory of your kitchen. Write down what you need to pick up from the store. Also, shop early. Don’t wait until the day before. You will have more options and less stress! And don’t forget to get those coupons! You can find some online and add to your loyalty card and others you can print off.
Decor – Like Halloween, check what you have and determine if you want to update or replace anything. You might want to check any tree lights and make sure they work!
Other – Do you do a cookie exchange? Or donations to your favorite charities? Write all of it down! Do you need to travel? Wrapping paper? Cards?
Gifts
Write down everyone you would like to buy gifts for.
Determine how much you want to and are able to spend on each person
Look for coupons, sales, and online discount codes.
If you know you’ll be out on Black Friday, you will already have your list and know exactly what you want to grab. But you may also see that toy your kid wants randomly on sale now and can grab it early!
Top Five Holiday Budgeting Tips
Keep it simple and sustainable. For example, you can gift children something they want, need, wear, and read. We always gift our nephews a toy, a shirt, and a book.
Avoid using credit cards unless you know you’ll pay off the balance in full every month. We use our credit cards and pay off monthly to get travel miles and cash back.
Keep your gift lists and other inventory lists with you when you are out. You never know when you will find a good deal!
Use a tracker to keep track of your budget and how much you have spent.
Set yourself up for next year. Add up what you spent this year and add 10%. Figure out when you need to start saving (January, July) and how much you’ll need to set aside. Make a bucket in your savings for Holidays (or a new account or a cash envelope – however you save).
Have you started your holiday budgeting plan yet? What does your budget look like?
Google’s dictionary, provided by Oxford Languages, defines self-care as:
the practice of taking action to preserve or improve one’s own health.
the practice of taking an active role in protecting one’s own well-being and happiness, in particular during periods of stress.
Is planning self-care? Based on this definition, yes, yes it is.
Planning can help you manage stress. When you plan, you know what your day, week, and month consist of. You will be able to see what you have going on and set boundaries for your time. You can also prioritize your to-do list and include time for self-care. After you have been planning for a bit you start to figure out how much you can really do in a day or week and stop overextending yourself which helps keep your stress levels down.
Planning can also help you be more mindful which will help reduce stress. By planning, you are creating intentions. You are directing your time and energy. Planning as part of your routine can be very grounding. You know every Sunday you will sit down for 30 minutes and set your schedule for the week.
Planning can increase positivity. When you plan, you put things on your calendar to look forward to. Knowing you have a vacation or BFF brunch coming up can make you smile, even when you are having a tough day.
Being an active participant rather than letting things happen helps reduce stress.
Planning in and of itself can be an act of self-care. If you set aside time each week to sit with your planner and set everything up for the coming week, you feel more relaxed and prepared. You will also have this “me time” to look forward to. Let your family know these 30 minutes are your time and ask to be left alone. Make your favorite beverage, light a candle, and turn on your favorite playlist. Then enjoy your time!
Since you are using planning as self-care, plan how you want. Not how you think you should based on youtube or Instagram. Enjoy a minimal planner using pencil? Go for it! Love laying down all the stickers? Yes! Or maybe you don’t have a pre-printed calendar and make a bullet journal. You do you. Your planner is for you and only you.
Plan the way that makes you happy. And be sure to schedule some time for other self-care activities!
How can you make time for planning and self-care? Besides planning, what are some of your favorite ways to practice self-care?
Don’t have a planner? Check out my favorite pre-printed planners at Erin Condren! More interested in bullet journaling? Head over to Archer and Olive for beautiful dot grid notebooks!
I am an Erin Condren and Archer and Olive affiliate. If you purchase through my links I will earn a small commission. And if you want to save 10% at Archer and Olive use my affiliate code Runsonespresso.
Do planners recommended for people with ADHD actually help more than other planners for someone with ADHD?
Let’s find out!
Today we are reviewing the Essential Daily Planner. This planner comes in three sizes, 5×8 ($15.95), 7×9 ($17.95), and 8.5×11 ($19.95). I am reviewing the 5×8 version. They all are cream paper with wire-o binding and come with a snap-in ruler with sticky notes.
Links are Amazon Associate links. I may earn a small commission if you purchase through my link.
I used the planner for three weeks and here are my thoughts. First, for me, the 5×8 is too small. Or my handwriting is too big. I made an attempt to write smaller and a few different ways to make a to-do list in the top section. I also moved items around to see how they would work in different spots. I think my week two and three worked much better than week one.
I do like how simple and clean the layout is. There’s nothing to really distract you. The monthly overview is simple and has enough room to fit a few items. As with most planners, there is a notes sidebar on the month. There is no dashboard. It goes right into the weeks. The weekdays are split in two, the top half being a blank to-do section and the bottom is times from 7 am to 8 pm.
One thing I did not like is the time section. I thought I would but when I had things on the half hour, there wasn’t really a spot for it. The hour has a line and the half-hour gets dots. It was a struggle when I had something at 8 and 8:30. The 8:30 item got squeezed on the dots.
The other thing that really bothered me and would probably stop me from using this planner is each week has a mini month for the current month and next month. I don’t need both and it takes up precious space on the Saturday/Sunday column. I’d rather have the space for additional weekend space. I hate planners that don’t give room for weekends because that’s when I do ALL the things! I peeped the larger sizes and they have the mini calendars next to each other and a weird space below them. I don’t know why they wouldn’t put them on the bottom of the page and make Saturday/Sunday bigger?
Overall, it’s not a BAD planner. The 5×8 is a good size if you need to carry it with you. The best part is the simple layout and it’s not too distracting. Although I think the weird mini planners in the larger size would annoy me with that extra space below them.
The limited space, especially in the 5×8, means you gotta make choices. What do you really NEED to do? This is helpful for someone like me who thinks they can do EVERYTHING and it all only takes 15 minutes! I’m never late but I have other difficulties with time. I think things won’t take as long as they do.
It would also be good if you do time blocking. I used the time section to mark off my work hours but you could also do that with tasks. I do not do time blocking. I have tried in the past and I usually end up doing whatever I feel like for however long instead of following the blocks.
Each of us with ADHD is different. While this was not the planner for me, maybe it will be perfect for you! What are your thoughts on this planner? Do you think it would be a good one for you?
If you want the Essential Daily Planner, head over to my YouTube and watch my video on it because it will tell you how you can win it!